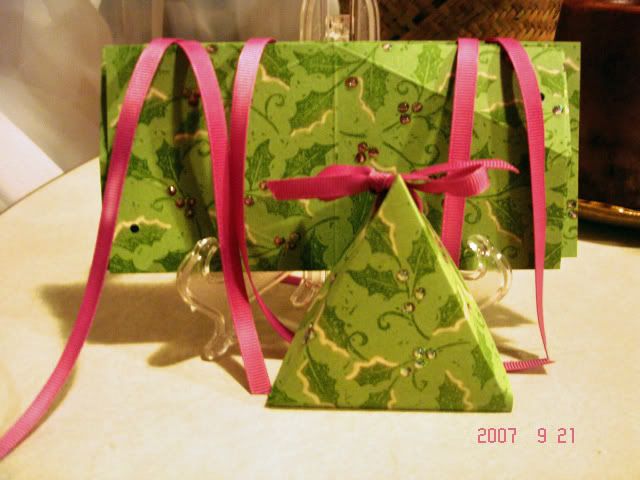
These little triangular boxes are super simple to make.
To make the box.
1. Cut cardstock 3"x6" Decorate as desired, wait to put dimensional decorations until put together.
2. with the 6" length at the base of your paper scorer, Score at 3"
3. Mark on the 3" length at 1 1/2 (half way), on both sides. Score diagonally from the 1/2 way point of the 3" length to the score line made at 3". 
3. punch holes on each corner, I used the 1/8th" hole punch on my cropadile.

3. punch holes on each corner, I used the 1/8th" hole punch on my cropadile.
4. Fold the corners in to give a crease
5. As shown, pull ribbon through from the outside in hole 1, then from the outside of hole 2. Now is the best time to pop that treat in the box, then bring the ribbon through from the inside of hole 3 and from the inside of hole 4. Pull tight and tie.
6. Add any dimensional additions wanted.
On my example. I used wild wasabi cardstock and rolled Woodcut Holly Jumbo wheel in wild wasabi. Using household bleach and a small paintbrush I then outlined a few of the holly leaves to give it dimension. I used a blender pen and the lid of my purely pomegranate ink pad to color in the berries, they showed up nicely! I then added a tad of stickles to each berry.
For the ribbon. I used THIS method for dying my ribbon Purely Pomegranate.
Recipe:
Cardstock: Wild Wasabi
Ink: Wild Wasabi, Purely Pomegranate
Accessories: White SU grossgrain ribbon, bleach


3 comments:
That is very cute, Krista! Thanks for the tutorial. I may use this for some Christmas gifts. They would make cute Halloween treat boxes, too. Something different for the little kiddos. :) Stop by and see my blog at http://wishiniwasstampin.blogspot.com
Lovely idea! Thanks for the Tut.
Great project.
Teresa
Post a Comment